No, not a Vacuum or Thermos flask, okay?
I mean Flask, a very popular Python micro-web framework. It is so because it requires no particular tools or libraries to develop web applications. You do not need to validate forms, have a database abstraction layer, or any other components that have pre-existing third-party libraries which provide basic functions. This particular flask has gat it all, to begin with.
Kati, here's how we gonna roll it:
- Installation, the very start of bugs, though no one will tell you.
- Run the only successful program, "Hello World!" with Flask.
- Check through the Directories.
- Might as well want to check how Files are structured.
- We shall do a little bit of Configuration.
- And pray it works out because then, we do Initialization.
- Sometimes you have to jump in the air if it works out, but we shall Run, Flask, Run!
- If you doubt what you see, how about Views?
- Not impressed yet? Okay, hold on for the Templates.
- Voilà, we gat it, shall we do a Conclusion?
Kati tusimbule...
Installation
We need the following installed to get going, otherwise don't kusimbula:
- Python (in this case, Python 3).
If you already have Python installed on your system, you should see the following output when you run $ python on the command line:
$ python
Python 3.8.10 (default, Jun  2 2021, 10:49:15)
[GCC 9.4.0] on linux
Type "help", "copyright", "credits" or "license" for more information.
>>>
Installing virtualenv, creates a Python environment that we need to keep all the dependencies used by different Python projects together. And installing virtualenvwrapper, which is a set of extensions that provide simpler commands while using virtualenv.
To do this, we need our little friend pip.
$ pip install virtualenv
$ pip install virtualenvwrapper
$ export WORKON_HOME=~/Envs
$ source /usr/local/bin/virtualenvwrapper.sh
Now, to create and activate a virtualenv, run the following commands:
$ mkvirtualenv flask-env
$ workon flask-env
Note: flask-env is custom, name your environment as best as you can remember.
Oh, yeah, now we have a virtual environment called flask-env, which is activated and running.
In this env, all dependencies we install will be kept.
Note: Remember to always activate this env to work on this or other projects.
Great, now let's create a directory for our app where all our files will go:
$ mkdir flask-project
$ cd flask-project
Feeling good? Let's now install, yes, Flask. We'll need our little friend pip again:
$ pip install Flask
Kyo! Let's see what is contained in the flask, definitely harimu amaate, there are some dependencies that come along:
$ pip freeze
click==6.6
Flask==2.0.1
itsdangerous==0.24
Jinja2==2.11.2
MarkupSafe==0.23
virtualenv==20.0.17
Werkzeug==0.11.11
wadllib==1.3.3
wrapt==1.12.1
zipp==1.0.0
Wazireeba? So, Flask uses Click (Command Line Interface Creation Kit) for its command-line interface to add custom shell commands for your app. itsdangerous provides security when sending data using cryptographical signing. Jinja2 (Not Jinja where they brew Nile Special from), is a powerful template engine for Python, while MarkupSafe is a HTML string handling library. Werkzeug is a utility library for WSGI (Web Server Gateway Interface), a protocol that ensures web apps and web servers can communicate effectively.
You can save the output above in a file. This is good practice because anyone who wants to work on or run your project will need to know the dependencies to install. The following command will save the dependencies in a requirements.txt file:
pip freeze > requirements.txt
"Hello World!" with Flask
Any beginner must run a "Hello World!" program. To some, this becomes their only successful program in that language, ever! But you don't want to end up like that, do you? So here's how to do our ting in Flask:
Create the following file, hello_world.py, in your favourite text editor; VS Code, Atom, Sublime Text3, and if you ask PHP developers nicely, they will tell you even Microsoft Word, winks:
# hello_world.py

from flask import Flask
app = Flask(__name__)

@app.route('/')
def hello_world():
    return 'Hello World!'
To begin, we import the Flask class and creating an instance (the object, flask) of it. We use the __name__ argument to indicate the app's module or package so that Flask knows where to find other files such as templates. Then we have a simple function that will display the string Hello World!. The preceding decorator simply tells Flask which path to display the result of the function. In this case, we have specified the route /, which is the home URL.
Let's see this in action, shall we? In your terminal, run the following:
$ export FLASK_APP = hello_world.py
$ flask run
 * Serving Flask app "hello_world.py"
 * Environment: production
   WARNING: This is a development server. Do not use it in a production deployment.
   Use a production WSGI server instead.
 * Debug mode: off
 * Running on http://127.0.0.1:5000/ (Press CTRL+C to quit)
- The first command tells the system which app to run.
- The next one starts the server.
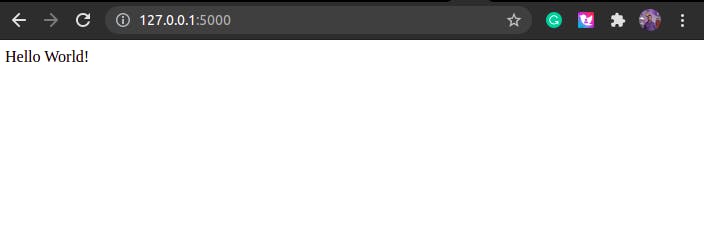
- Now Enter the specified URL (http://127.0.0.1:5000/) in your browser, don't worry, even Internet Explorer is faster here.

Twashuba twanywa, it did work!
Flask Directories
With only one functional file: hello_world.py, like our project, we are far from a fully-fledged real-world web application that comes bundled up with a lot of files. Therafwa, it is important to maintain a good directory structure to organize the different components of the application separately.
The following are some of the common directories in a Flask project:
/app: This is a directory withinflask-project. We'll put all our code in here, and leave other files, such as therequirements.txtfile, outside./app/templates: This is where all HTML files will go./app/static: This is where static files such as CSS and JavaScript files as well as images usually go. However, we won't be needing this folder for this tutorial since we won't be using any static files.
$ mkdir app app/templates
With that command, your project directory should now look like this:
├── flask-project
       ├── app
       │   ├── templates
       ├── hello_world.py
       └── requirements.txt
Well, you can see where the hello_world.py is now. Kinda out of place now, isn't it? Rindaaho we'll fix it soon.
Flask File Structure
In the "Hello World!" example, we only had one file (remember it?). Well, for us to build a huge website, we'll need more files that serve various functions. And this brings about such a file structure that is common with most Flask apps:
run.py: This is the application's entry point. We'll run this file to start the Flask server and launch our application.config.py: This file contains the configuration variables for your app, such as database details.app/__init__.py: This file initializes a Python module. Without it, Python will not recognize the app directory as a module.app/views.py: This file contains all the routes for our application. This will tell Flask what to display on which path.app/models.py: This is where the models are defined. A model is a representation of a database table in code. However, because we will not be using a database in this tutorial, we won't be needing this file.
Now ahead and create these files, and also delete hello_world.py since we won't be needing it anymore:
$ touch run.py config.py
$ cd app
$ touch __init__.py views.py
$ rm hello_world.py
And there you have your directory structure homeboy:
├── flask-project
       ├── app
       │   ├── __init__.py
       │   ├── templates
       │   └── views.py
       ├── config.py
       ├── requirements.txt
       └── run.py
Heads up! Time to code now...
Configuration
The config.py file should contain one variable per line as you see below:
# config.py

# Enable Flask's debugging features. Should be False in production
DEBUG = True
Note: This config file is very simplified and would not be appropriate for a more complex application. For bigger applications, you may choose to have different config.py files for testing, development, and production, and put them in a config directory, making use of classes and inheritance. You may have some variables that should not be publicly shared, such as passwords and secret keys. These can be put in an instance/config.py file, which should not be pushed to version control.
Initialization
Now, we have to initialize our app with all our configurations. This is done in the app/__init__.py file. Note that if we set instance_relative_config to True, we can use app.config.from_object('config') to load the config.py file.
# app/__init__.py

from flask import Flask

# Initialize the app
app = Flask(__name__, instance_relative_config=True)

# Load the views
from app import views

# Load the config file
app.config.from_object('config')
Flask, Run!
All we have to do now is configure the run.py file so we can start the Flask server.
# run.py

from app import app

if __name__ == '__main__':
    app.run()
To use the command flask run as we did before, we would need to set the FLASK_APP environment variable to run.py:
$ export FLASK_APP = run.py
$ flask run
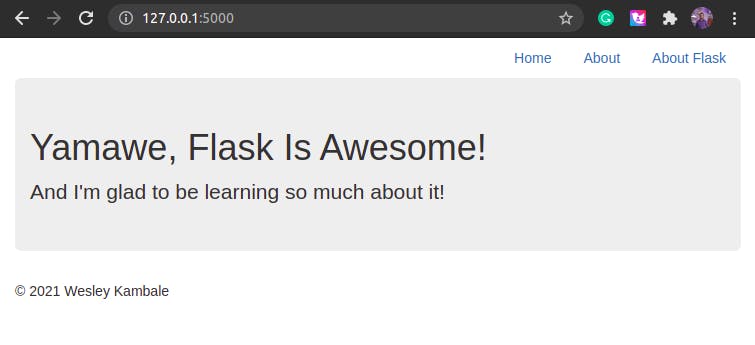
First error? Nah, it is just a 404 page because we haven't written any views for our app. That'll be fixed as we go on.
Views in Flask
With our "Hello World!" example, you by now have an understanding of how views work. We use the @app.route decorator to specify the path where we would like the view to be displayed on. Let's now see what else we can do with views.
# views.py

from flask import render_template

from app import app

@app.route('/')
def index():
    return render_template("index.html")


@app.route('/about')
def about():
    return render_template("about.html")
Now, Flask comes with a method, render_template, which we use to specify which HTML file should be loaded in a particular view. Of course, the index.html and about.html files do not exist yet, so Flask will give us a Template Not Found or Internal Server Error when we navigate to these paths.
Templates
Flask allows us to use a variety of template languages, but Jinja2 is the most popular one. Jinja2 provides syntax that allows us to add some functionality to our HTML files, like if-else blocks and for loop, and also use variables inside our templates. Jinja2 also lets us implement template inheritance, which means we can have a base template that other templates inherit from.
Let's begin by creating the following three HTML files:
$ cd app/templates
$ touch base.html index.html about.html
We'll start with the base.html file, using a slightly modified version of this example Bootstrap template:
<!-- base.html -->

<!DOCTYPE html>
<html lang="en">
  <head>
    <title>{% block title %}{% endblock %}</title>
    <!-- Bootstrap core CSS -->
    <link href="https://maxcdn.bootstrapcdn.com/bootstrap/3.3.7/css/bootstrap.min.css" rel="stylesheet">
    <!-- Custom styles for this template -->
    <link href="https://getbootstrap.com/examples/jumbotron-narrow/jumbotron-narrow.css" rel="stylesheet">
  </head>
  <body>
    <div class="container">
      <div class="header clearfix">
        <nav>
          <ul class="nav nav-pills pull-right">
            <li role="presentation"><a href="/">Home</a></li>
            <li role="presentation"><a href="/about">About</a></li>
            <li role="presentation"><a href="http://flask.pocoo.org" target="_blank">About Flask</a></li>
          </ul>
        </nav>
      </div>
      {% block body %}
      {% endblock %}
      <footer class="footer">
        <p>© 2021 Wesley Kambale</p>
      </footer>
    </div> <!-- /container -->
  </body>
</html>
Did you notice the {% block %} and {% endblock %} tags? We'll also use them in the templates that inherit from the base template:
<!-- index.html-->

{% extends "base.html" %}
{% block title %}Home{% endblock %}
{% block body %}
<div class="jumbotron">
  <h1>Flask Is Awesome</h1>
  <p class="lead">And I'm glad to be learning so much about it!</p>
</div>
{% endblock %}
<!-- about.html-->

{% extends "base.html" %}
{% block title %}About{% endblock %}
{% block body %}
<div class="jumbotron">
  <h1>The About Page</h1>
  <p class="lead">You can learn more about my website here.</p>
</div>
{% endblock %}
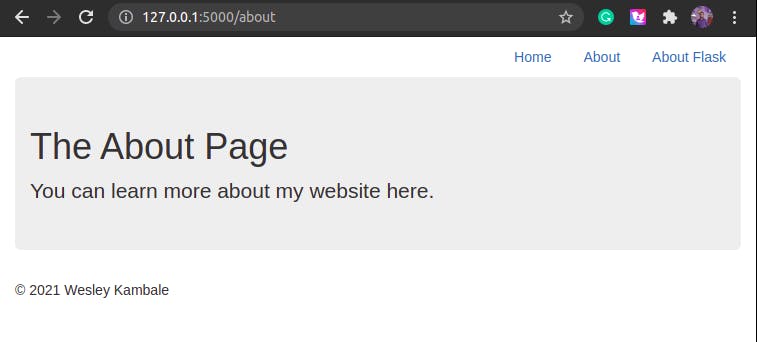
We use the {% extends %} tag to inherit from the base template. We insert the dynamic content inside the {% block %} tags. Everything else is loaded right from the base template, so we don't have to re-write things that are common to all pages, such as the navigation bar and the footer.
Refresh that browser, iwe mwanawe!


Kati awo nebwentema!, but first:
Conclusion
You made it! Congratulations on nailing your first Flask web application up! Explore more. You now have a great foundation to start building more complex apps. Check out the official documentation for more information and examples.
Had fun? Follow @WesleyKambale on Twitter.
Inspiration and credits for the HTML files go out to Mbithe Nzomo
Any discussions? Let's have a conversation in the comments below.

